Many people have lots of stunning photos on iPhone. They want to play and view their iPhone mp4, MOV, H.264, MPEG-4, HD or fps video clips on the big TV screen, but how to do that? To display and watch your videos from iPhone 4, 3GS on television, you need to burn and convert them to a DVD disc.
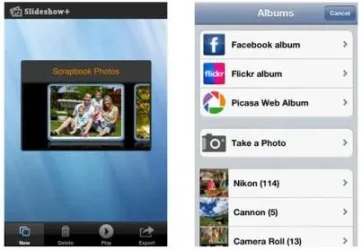
I'd like to show you how to make a slideshows of your iPhone photos even though Facebook photos, Picasa photos and Flickr photos directly on your iPhone.
First you need an app which named Photo Slideshow Director. It can help you turn your photos into dynamic slideshow, complete with background music, transitions, texts, themes, etc. You can also make full use of the photo editor embedded in this app to crop, rotate and flip the photo, adjust the brightness, saturation and contrast, apply beautiful stylistic effects, remove red eyes, add text or drawing and more.

Simple steps of creating slideshow on iPhone.
1 . Add photos from iPhone album.
2. Set the transition effect and time.
3. Add background music and theme.
4. Export the slideshow to HDTV.
You can export the slideshow as a video file by choosing to share moives to your iPhone Photo Library.
Now photos has been converted to iPhone video but how to burn to DVD. You just need to connect your iPhone to a PC or Mac, copy the encoded video from your Photo Library to the PC or Mac, import the video into Windows DVD Maker (PC) or iDVD (Mac) and then burn the video to DVD within the program.
If you are still confuse the steps I'd like to once again simplify the process of making photo slideshows on iPhone and burning to DVD:
1. Download the iPad app Photo Slideshow Director from the iTunes app store
2. Create photo slideshows using Photo Slideshow Director and save it to your iPad photo library as a HD video
3. Connect your iPad to a PC or Mac
4.Copy the slideshow video from your iPac to the PC or Mac
5.Import the slideshow video into Windows DVD Maker (PC) or iDVD (Mac)
6. Burn the slideshow video to DVD in Windows DVD Maker or iDVD
I'd like to show you how to make a slideshows of your iPhone photos even though Facebook photos, Picasa photos and Flickr photos directly on your iPhone.
First you need an app which named Photo Slideshow Director. It can help you turn your photos into dynamic slideshow, complete with background music, transitions, texts, themes, etc. You can also make full use of the photo editor embedded in this app to crop, rotate and flip the photo, adjust the brightness, saturation and contrast, apply beautiful stylistic effects, remove red eyes, add text or drawing and more.

Simple steps of creating slideshow on iPhone.
1 . Add photos from iPhone album.
2. Set the transition effect and time.
3. Add background music and theme.
4. Export the slideshow to HDTV.
You can export the slideshow as a video file by choosing to share moives to your iPhone Photo Library.
Now photos has been converted to iPhone video but how to burn to DVD. You just need to connect your iPhone to a PC or Mac, copy the encoded video from your Photo Library to the PC or Mac, import the video into Windows DVD Maker (PC) or iDVD (Mac) and then burn the video to DVD within the program.
If you are still confuse the steps I'd like to once again simplify the process of making photo slideshows on iPhone and burning to DVD:
1. Download the iPad app Photo Slideshow Director from the iTunes app store
2. Create photo slideshows using Photo Slideshow Director and save it to your iPad photo library as a HD video
3. Connect your iPad to a PC or Mac
4.Copy the slideshow video from your iPac to the PC or Mac
5.Import the slideshow video into Windows DVD Maker (PC) or iDVD (Mac)
6. Burn the slideshow video to DVD in Windows DVD Maker or iDVD


